Overview
Quick Build
Artifacts
Echoes of an Offering
4-Piece · ATK/Proc-based
Sands
ATK%
Main stat
Goblet
Hydro DMG%
Main stat
Circlet
CRIT Rate / DMG
Substats
CRIT Rate ≥ CRIT DMG > ATK% > HP%
Strengths
- Strong, consistent damage output in both multi-target and single-target scenarios
- Valuable on-field and off-field Hydro application
- Wide variety of team compositions
- Multiple Resin-efficient artifact options
- High viability without Constellations
Weaknesses
- 12s Skill cooldown resulting in 24–25s rotations which do not sync well with most other characters’ cooldowns
- Free-to-play weapon selection that performs significantly worse than other options
- Lack of front-loaded damage without Constellations
- Competition from other Hydro units
- Team compositions that require highly-contested teammates
Talent Priority
Crown priority on Ayato: Elemental Skill. Most of their value scales here.
Lowest ROI on Ayato. Level Elemental Burst only after the rest of the kit is comfortable.
Substat Priority
Double Hydro resonance and Kokomi's Jellyfish provide ample Hydro Particles. 130% is comfortable.
Fewer Hydro Particles without a second Hydro unit. Aim for 140% or use Favonius Sword.
Mostly Hydro Particles from Ayato alone. Use Festering Desire or aim for 145% ER.
Double Hydro resonance (Ayato + Kokomi) provides +25% HP for better Namisen scaling and more Hydro Particles. Use Favonius Sword or Festering Desire if ER-starved.
Weapons
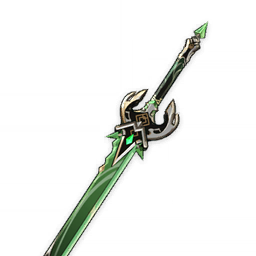
5-star Weapons

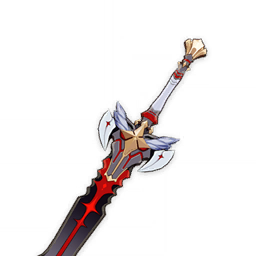
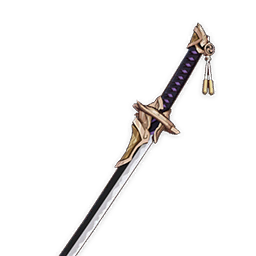
4-star Weapons

Artifact Sets

Sands
ATK%
Goblet
Hydro DMG%
Circlet
CRIT Rate / DMG

Sands
ATK%
Goblet
Hydro DMG%
Circlet
CRIT Rate / DMG

Sands
ATK%
Goblet
Hydro DMG%
Circlet
CRIT Rate / DMG
Team Compositions

Ayato
Main DPS

Shenhe
Support

Kazuha
Support

Kokomi
Healer / Hydro
Ayato's most common high-end team. Shenhe buffs all Cryo DMG and provides Cryo RES shred; Kazuha groups enemies and provides Hydro/Cryo DMG Bonus; Kokomi provides off-field Hydro and healing. Ayato's rapid Shunsuiken attacks freeze enemies continuously, and Blizzard Strayer CRIT Rate bonus applies to Shenhe's periodic hits.
On-field Hydro DPS. Rapid Shunsuiken attacks apply Hydro at an extremely high rate, triggering Freeze with Shenhe/Ganyu's Cryo application. All hits benefit from Blizzard Strayer's passive CRIT Rate when against Frozen targets.
Provides Cryo application for Freeze and Icy Quills that buff all Cryo hits (Kokomi's Bake-Kurage, Shenhe's own hits). Also Cryo RES shred via Burst.
Groups enemies for Ayato's AoE. Swirls Hydro or Cryo to provide +35–40% Hydro or Cryo DMG Bonus to the team. Reduces both Hydro and Cryo RES.
Bake-Kurage provides consistent off-field Hydro for when Ayato exits his Skill stance. Heals the team. Double Hydro resonance with Ayato also grants +25% HP — boosting Namisen stacks.
Talents & Constellations
Talents
Standard 5-hit sword combo. During Takimeguri Kanka (Skill), Normal Attacks become Hydro Shunsuiken slashes — fast, individual hits that each build Namisen stacks. Level alongside Skill.
Ayato enters Takimeguri Kanka stance for 6 seconds. Normal Attacks become Hydro Shunsuiken slashes dealing Hydro DMG with no ICD (each hit can react independently). Each hit grants a Namisen stack (max 5); stacks multiply Shunsuiken DMG by a % of Max HP (max 56% at 5 stacks). Stance ends if HP changes. During Kyouka, he can't use Charged Attacks.
Deploys a Weeping Willow of the Lake sphere that deals AoE Hydro DMG every 0.5s for 18 seconds. While inside the sphere, all party members' Normal Attack SPD is increased by 11%. The off-field Hydro also enables reactions for teammates. Costs 80 Energy.
While in Takimeguri Kanka, when Ayato has 5 Namisen stacks, each Shunsuiken hit has a 50% chance to ignore 45% of the enemy's DEF. In practice this averages roughly 22.5% DEF ignore per hit at max stacks — a significant damage bonus against high-DEF enemies.
Characters under the effect of Kamisato Art: Suiyuu (inside the Burst sphere) gain +2 Normal Attack hits and their Normal Attack DMG is increased by an amount scaling off Ayato's Max HP. This means Burst proximity actively amplifies teammate Normal Attack damage — strong in teams where the whole party fights close-range.
Constellations
At the end of Takimeguri Kanka, Ayato unleashes a 2-hit Shunsuiken combo dealing 300% of the skill's Shunsuiken DMG. Direct damage increase to the Skill window.
Is it worth getting?
Solid constant DPS upgrade. Not a reason to pull but very welcome.
Maximum Namisen stacks raised from 5 to 6, and if Ayato has at least 3 Namisen stacks, his Max HP is increased by 50%. The HP increase amplifies Namisen's HP-scaling DMG bonus and also boosts the Burst field's HP-scaling ATK bonus.
Is it worth getting?
Large HP and DMG increase. The +50% Max HP is substantial for Namisen scaling. A meaningful constellation.
Increases Kamisato Art: Suiyuu level by 3.
Is it worth getting?
Incremental Burst damage and Burst field DMG bonus increase.
After Takimeguri Kanka ends, Ayato fires 2 extra Shunsuiken slashes for 3 seconds. Extends his effective damage window beyond the Skill stance.
Is it worth getting?
Extra damage after stance ends — smooths out rotation gaps.
Increases Kamisato Art: Kyouka level by 3, boosting Shunsuiken multipliers.
Is it worth getting?
Direct Shunsuiken damage improvement. The most impactful level up for his kit.
Shunsuiken hits gain +20% CRIT DMG. Every 10 hits resets Takimeguri Kanka's cooldown. Combined with C1 and C5, this enables a dramatically extended Skill window and significantly higher damage ceiling.
Is it worth getting?
Endgame investment. +20% CRIT DMG plus near-unlimited Skill resets represent a transformative DPS ceiling. The target for fully invested Ayato players.
C0 is fully viable. C2 is the most impactful constellation (HP buff). Endgame target: C6. First stop: C2. Endgame target: C6.
Alternatives to Ayato
Not sure Ayato is right for you? Compare against other characters to find your best pull.

Stronger single-target Hydro DPS; charged-attack focused, different playstyle.

Faster Hydro application and better off-field Burst; more complex rotation.

Best off-field Hydro Sub-DPS; frees your main DPS slot for another carry.